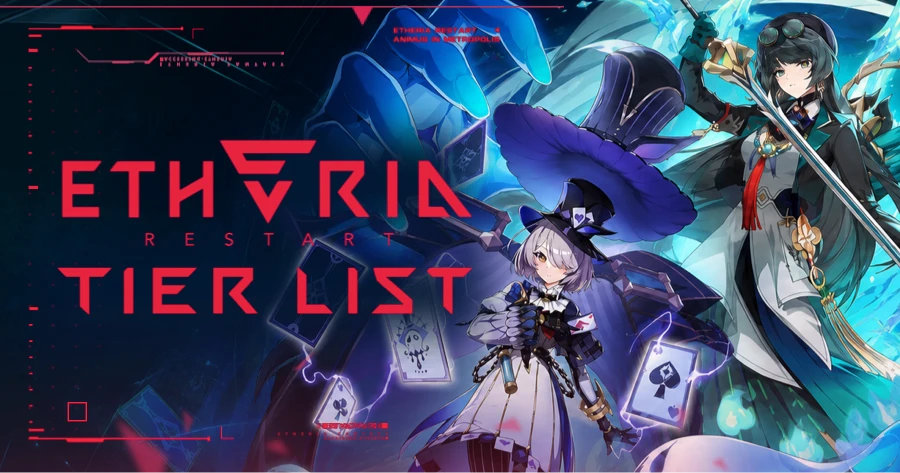

Alyosha is a **4-Star Electro Polearm character**from Snezhnaya who can continuously deal **Electro DMG from off-field** while also providing teamwide healing, enemy taunting, and team buffs.
Alyosha is a 4-Star Electro Polearm characterfrom Snezhnaya who can continuously deal Electro DMG from off-field while also providing teamwide healing, enemy taunting, and team buffs.
After the Genshin Version 7.0update, you can invite Alyosha to join your party by progressing through the Archon Quest Everwinter Without Mercy. He will also receive a boosted drop rate during the Phase I Event Wishes in Version 7.0 and is planned to join the standard wish pool in a later version.
Planning to pull Alyosha or other new Version 7.0 characters? Top up Genshin Impact Genesis Crystals at GamsGo and save up to 30% compared to in-game pricing.
 Alyosha Build Quick Guide
| Character Preview | Item | Recommendation |
|---|---|---|
 |
Rarity | 4-Star |
| Element | Electro | |
| Weapon | Polearm | |
| Role | Off-field Electro application, Healing, Buffing | |
| Core Mechanic | Stellar-Conduct | |
| Ascension Stat | Energy Recharge | |
| Talent Priority | Elemental Burst > Elemental Skill > Normal Attack | |
| Best 5-Star Weapon | Engulfing Lightning | |
| Recommended 4-Star Weapon | Favonius Lance | |
| Best Artifact Set | 4-Piece Noblesse Oblige | |
| Main Stats | ER/ATK% Sands, ATK% Goblet, ATK%/CRIT Rate Circlet | |
| Substat Priority | ER > ATK% > CRIT Rate | |
| ER Target | 180%–230% | |
| ATK Target | 2,000–3,000 | |
| Key Constellations | C2, C6, C1 |
Alyosha functions more like a utility-focused piece in Stellar-Conduct teams. Instead of relying on on-field damage, he combines off-field Electro application, healing, and team buffs in a single slot, allowing you to reserve more team slots for your main DPS and key reaction enablers.
Alyosha Kit Breakdown
Alyosha's kit is fairly straightforward. The key is understanding the interaction between Hunter's Mark and Tugarin. Once you understand these two mechanics, it becomes much easier to follow his rotation, see where his healing comes from, and understand how his Stellar-Conduct buffs are triggered.
Alyosha Skills
| Skill Type | Skill Name | Effect |
|---|---|---|
| Normal Attack | Skirmishing Spear | Performs up to four consecutive spear strikes. The final hit applies Hunter's Mark to enemies it hits. |
| Charged Attack | Skirmishing Spear — Charged Attack | Consumes a certain amount of Stamina to perform a spinning forward attack, dealing damage to enemies along its path. |
| Plunging Attack | Skirmishing Spear — Plunging Attack | Plunges from mid-air to strike the ground, damaging enemies along the descent and dealing AoE damage upon impact. |
| Elemental Skill (Press) | Thunderbolt Strike — Press | Quickly attacks enemies in front of Alyosha, dealing AoE Electro DMG and applying Hunter's Mark to enemies hit. |
| Elemental Skill (Hold) | Thunderbolt Strike — Hold | Enters Aiming Mode and locks onto enemies within a certain area ahead. Alyosha gains increased Interruption RES while aiming. When the Hold is released, he attacks the locked targets, dealing Electro DMG and applying Hunter's Mark. |
| Elemental Burst | Hunter's Advance | Summons Alyosha's companion Tugarin to fight alongside him and creates a Fulgurite Hunting Field in front of him for a period of time. |
| Field Effect | Fulgurite Hunting Field | Continuously taunts nearby enemies, drawing their attacks toward the field's target, while periodically dealing AoE Electro DMG to enemies within the area. |
| Summon Effect | Tugarin | Tugarin continuously attacks nearby enemies and prioritizes targets affected by Hunter's Mark. Its attacks can trigger effects associated with Hunter's Mark and work with Alyosha's Passive Talent to provide healing. |
Recommended Talent Priority: Elemental Burst > Elemental Skill > Normal Attack
Prioritize leveling Alyosha's Elemental Burst and Elemental Skill to Level 8, then raise them further once you have enough resources. His Normal Attack is mainly used for regular damage and as an additional way to apply Hunter's Mark.
Since Alyosha is primarily an off-field support, upgrading his Normal Attack is a much lower priority.If your resources are limited, you can leave his Normal Attack unleveled for now.
Alyosha Talents
| Type | Name | Passive Effect | Usage Notes |
|---|---|---|---|
| Ascension Passive | Awakened by the Baying Hounds | When Tugarin attacks, it restores HP to nearby party members. The healing amount is equal to 120% of Alyosha's ATK. | Alyosha's healing scales directly with ATK. Once you have enough Energy Recharge to maintain his Burst rotation, increasing ATK will further improve his healing. |
| Ascension Passive | Suffer the Winter Wheat Will | For every 1% of Energy Recharge Alyosha has, his Elemental Skill DMG and Elemental Burst DMG are increased by 0.35%, up to a maximum increase of 70%. | This makes Energy Recharge Alyosha's key stat. Reaching 200% ER is enough to obtain the full theoretical DMG Bonus from this passive. |
| Special Combat Talent | Into the Fray | When Alyosha enters a Polestar Field, he enters the Radiance: Stellar-Conduct state. The Hunter's Precision gained by triggering Hunter's Mark also increases Stellar-Conduct DMG dealt by nearby party members by 20%. | Strengthens Alyosha's role in Stellar-Conduct teams, allowing him to provide off-field Electro application, healing, and reaction-related buffs in a single team slot. |
| Exploration Passive | Treetop Watch | Displays the location of nearby resources unique to Snezhnaya on the mini-map. | Useful when exploring Snezhnaya and farming local specialties, especially when gathering character ascension materials. |
Once you understand these talents, Alyosha's build priorities become much clearer: first make sure his Elemental Burst can be used consistently, then focus on increasing his ATK.
Hunter's Advance costs 70 Energy and is the core of Alyosha's off-field damage, healing, and support capabilities. This makes Energy Recharge his highest-priority stat.
His Passive Talent Suffer the Winter Wheat Will also converts Energy Recharge into damage. For every 1% Energy Recharge, Alyosha gains a 0.35% DMG Bonus to his Elemental Skill and Elemental Burst, up to a maximum of 70%. At the same time, Tugarin's healing scales with 120% of Alyosha's ATK.
In other words, ER keeps his rotation running, while ATK improves both his healing and damage. Together, they form the core of Alyosha's stat requirements.
As a starting point, aim for around 180%–230% Energy Recharge. If your team generates plenty of Energy, includes another Electro character, or you already have C1, you can stay closer to the lower end of this range. If Alyosha is the only Electro character or the team generates fewer particles, aim higher.
When using Favonius Lance, try to reach around 50%–60% CRIT Rate as well so you can trigger its passive more reliably.
Alyosha Constellations
| Constellation | Name | Effect |
|---|---|---|
| C1 | Frostvale Thunderclap | When nearby party members trigger an Electro-related reaction, Alyosha restores 15 Energy. This effect can occur once every 18s. |
| C2 | Howl From Afar | Extends the duration of Alyosha's Elemental Burst by 6s. Before Tugarin attacks an enemy, it first applies Hunter's Mark. This application does not directly trigger an existing Hunter's Mark. |
| C3 | Friendly Call | Increases the Level of Thunderbolt Strike by 3. Maximum upgrade level is 15. |
| C4 | Harvest the Spoils | When Tugarin launches an attack, it restores HP to the nearby party member with the lowest HP percentage. The healing amount is equal to 60% of Alyosha's ATK. |
| C5 | When the Nightbird Falls Silent | Increases the Level of Hunter's Advance by 3. Maximum upgrade level is 15. |
| C6 | Standard Reclaimed | Hunter's Precision gained after triggering Hunter's Mark can stack up to 2 times. At maximum stacks, affected characters gain 100 Elemental Mastery. |
Alyosha is not a character who needs Constellations to function properly. At C0, he already has a complete support kit, while C2 mainly improves his overall comfort and Burst uptime. C6 pushes his reaction-support capabilities to a higher level.
For most players, C2 offers the best overall value.
Best Artifacts for Alyosha
Alyosha’s artifact setup is straightforward: keep his Elemental Burst available every rotation, then build ATK to improve both healing and personal damage.
| Category | Recommendation | Notes |
|---|---|---|
| Best Artifact Set |  4-Piece Noblesse Oblige 4-Piece Noblesse Oblige |
Best all-around choice if no other teammate is using it. The 2-piece bonus increases Elemental Burst DMG, and the 4-piece bonus gives the whole team an ATK buff after Alyosha uses his Burst. |
| Stellar-Conduct Alternative |  4-Piece Heart of the Furnace 4-Piece Heart of the Furnace |
Strong option for Stellar-Conduct teams, with more focus on ATK and Stellar reaction damage. If Odette or another teammate is already using it, Noblesse Oblige is usually the better choice for Alyosha. |
Artifact Main Stats and Substats
| Slot | Recommended Stats | Notes |
|---|---|---|
| Sands of Eon | Energy Recharge / ATK% | Energy Recharge is the safer default if your Burst uptime is not stable. ATK% works better once Energy needs are already covered. |
| Goblet of Eonothem | ATK% | ATK% is the most practical choice because it improves both Tugarin’s healing and part of Alyosha’s damage. |
| Circlet of Logos | ATK% / CRIT Rate | ATK% is the standard option. CRIT Rate is mainly recommended when using Favonius Lance so you can trigger its passive more consistently. |
| Substat Priority | Energy Recharge > ATK% > CRIT Rate | Alyosha cares more about smooth rotations and support value than double CRIT stats. |
| Energy Recharge Target | 180%–230% | Stay near the lower end if your team generates enough Energy. Aim higher if Alyosha is the only Electro character or your team produces fewer particles. |
| Build Focus | Prioritize Burst uptime first | As long as Alyosha can use his Elemental Burst reliably every rotation, your Energy Recharge is generally enough. |
Alyosha relies more on smooth rotations and support utility, so there is no need to chase double CRIT stats. ATK improves both his personal damage and Tugarin's healing.
For Energy Recharge, 180%–230% is a good target range. Stay closer to the lower end if your team generates enough Energy; if Alyosha is the only Electro character or the team generates relatively few particles, aim higher.
In short, if Alyosha can use his Elemental Burst reliably every rotation, your Energy Recharge is generally sufficient.
How to Choose Alyosha's Weapons?
When choosing a weapon for Alyosha, prioritize Energy Recharge first, followed by ATK and team utility.
| Weapon | Recommendation | Best For |
|---|---|---|
 Engulfing Lightning Engulfing Lightning |
★★★★★ | Highest overall ceiling, providing both high Energy Recharge and ATK. |
 Favonius Lance Favonius Lance |
★★★★★ | The most practical 4-Star option and also helps restore Energy for the team. |
 Tamayuratei no Ohanashi Tamayuratei no Ohanashi |
★★★★☆ | A strong option when Alyosha needs both Energy Recharge and ATK. |
 "The Catch" "The Catch" |
★★★★☆ | A free-to-play option that increases Elemental Burst damage. |
If you already have Engulfing Lightning, you can use it on Alyosha, but there is no need to pull a 5-Star weapon specifically for him.
For most players, Favonius Lance is the most practical choice. It helps ease Alyosha's own Energy requirements while also generating extra Energy for the team. If you use Favonius Lance, make sure to build enough CRIT Rate so its passive can trigger consistently.
Best Teams for Alyosha
Alyosha's main value in team building comes from supporting the main on-field DPS from off-field. Rather than treating him as a dedicated healer, he fits particularly well into Stellar-Conduct teams, where he can provide off-field Electro application, healing, and buffs at the same time.
If you do not have every recommended character, you can also replace individual slots with another main DPS or suitable support.
Sandrone Stellar-Conduct TeamStellar-Conduct

 Odette Stellar-Conduct Support
 Yae Miko Off-Field DPS
 Alyosha Healer / Buffer
Core Strategy: Sandrone serves as the main on-field damage dealer, while Odette and Yae Miko help maintain Stellar-Conduct reactions. Alyosha provides off-field Electro application, healing, and buffs, allowing Sandrone to stay focused on dealing damage. Cyno Stellar-Conduct TeamStellar-Conduct
 Cyno Main DPS
OdetteStellar-Conduct Support
Yae Miko Off-Field DPS
Alyosha Healer / Buffer
Core Strategy: Cyno handles most of the on-field damage, while Odette and Yae Miko provide reaction support and off-field damage. After leaving the field, Alyosha continues to provide healing and buffs, helping Cyno maintain a longer and more comfortable damage window. Wriothesley Stellar-Conduct TeamCryo DPS + Stellar-Conduct
 Wriothesley Main DPS
Odette Stellar-Conduct Support
Yae Miko Off-Field DPS
Alyosha Healer / Buffer
Core Strategy: Wriothesley acts as the main on-field DPS, while Odette, Yae Miko, and Alyosha maintain Stellar-Conduct from off-field. Once Alyosha finishes using his abilities, he can quickly swap out and leave more field time to Wriothesley. F2P Stellar-Conduct TeamBudget / Flexible
Sandrone / Cyno Main DPS
 Cryo Traveler Cryo Support
 Fischl Off-Field DPS
Alyosha Healer / Buffer
Core Strategy: If you are missing Odette or Yae Miko, Cryo Traveler and Fischl can fill the Cryo and off-field Electro slots. Alyosha continues to cover healing and support, making the team easier to build with a more accessible roster.
Alyosha Materials Summary
The table below lists the total materials required to fully level and ascend Alyosha, including Mora, EXP books, local specialties, boss drops, and talent materials.
| Material | Total Amount | Best Source |
|---|---|---|
 Mora Mora |
7,050,900 | Ley Line Outcrop: Blossom of Wealth |
 Hero's Wit Hero's Wit |
419 | Ley Line Outcrop: Blossom of Revelation |
 Flockingweed Flockingweed |
168 | Gather in Snezhnaya |
 Vajrada Amethyst Sliver Vajrada Amethyst Sliver |
1 | Electro Bosses / Crafting |
 Vajrada Amethyst Fragment Vajrada Amethyst Fragment |
9 | Electro Bosses / Crafting |
 Vajrada Amethyst Chunk Vajrada Amethyst Chunk |
9 | Electro Bosses / Crafting |
 Vajrada Amethyst Gemstone Vajrada Amethyst Gemstone |
6 | Electro Bosses / Crafting |
 Severed Tail of the Sky-Roamer Severed Tail of the Sky-Roamer |
46 | Chimeric Winged Lion |
 Chimeric Core Chimeric Core |
36 | Aberrant Chimeric Monsters |
 Symbiotic Chimeric Nucleus Symbiotic Chimeric Nucleus |
96 | Lv. 40+ Aberrant Chimeric Monsters |
 Prime Chimeric Nexus Prime Chimeric Nexus |
129 | Lv. 60+ Aberrant Chimeric Monsters / Crafting |
 Teachings of Fortitude Teachings of Fortitude |
9 | Snezhnaya Domain of Mastery |
 Guide to Fortitude Guide to Fortitude |
63 | Snezhnaya Domain of Mastery / Crafting |
 Philosophies of Fortitude Philosophies of Fortitude |
114 | Snezhnaya Domain of Mastery / Crafting |
 Elixir of the Heretic Elixir of the Heretic |
18 | The Doctor Weekly Boss, Lv. 70+ |
 Crown of Insight Crown of Insight |
3 | Events / Offering Systems |
Is Alyosha Worth Building?
If you plan to play Stellar-Conduct teams, Alyosha is definitely worth building.
He combines off-field Electro application, healing, and reaction-related buffs in a single slot, making him especially valuable for players who have already invested in Sandrone or Odette, or who plan to build a Stellar-Conduct team around Cyno.
Even at C0, Alyosha is already worth using because his core support kit is complete and does not depend on high Constellations to function properly.
On the other hand, if you do not plan to use Stellar-Conduct at all and already have well-built off-field Electro characters and healers, Alyosha becomes a lower-priority investment.
Conclusion
Alyosha is a practical 4-Star support for Stellar-Conduct teams in Version 7.0. His main strength is combining off-field Electro application, healing, and reaction-related buffs in a single team slot, making him especially useful for players who are already building Sandrone, Odette, or Cyno.
He also does not require heavy investment to work well. Prioritize enough Energy Recharge to use his Elemental Burst consistently, then focus on ATK. His core support kit is already complete at C0, while C2 is a comfortable stopping point if you want a smoother overall experience.
Planning to save Primogems and Wishes for Alyosha or other Version 7.0 characters? You can use GamsGo's Genshin Impact top-up service to get Genesis Crystals and Blessing of the Welkin Moon at lower prices, with fast delivery, refund protection, and multiple payment methods.
FAQ
When Will Alyosha Be Released?
Alyosha will be released with Genshin Impact Version 7.0 on August 12, 2026.
Can You Get Alyosha for Free?
Yes. After the Version 7.0 update, you can invite Alyosha to join your party by progressing through the Archon Quest Everwinter Without Mercy.
How Much Energy Recharge Does Alyosha Need?
Aim for around 180%–230% ER as a starting point. Running two Electro characters, using Favonius Lance, or having C1 can lower his Energy requirements, while teams with Alyosha as the only Electro character will usually need more ER.
Does Alyosha Need CRIT Stats?
For a standard support build, you do not need to prioritize both CRIT Rate and CRIT DMG. If you are using Favonius Lance, however, aim for around 50%–60% CRIT Rate to trigger its passive more consistently.
What Does Alyosha's Healing Scale With?
ATK. When Tugarin attacks, it restores HP to the nearby active character based on 120% of Alyosha's ATK.
What is Alyosha's Best Constellation?
If you are looking for a practical stopping point, C2 is the best choice. It extends his Elemental Burst duration by 6 seconds and allows Tugarin to apply Hunter's Mark proactively.
🔍 You Might Also Like:
Genshin 7.1 Banners: Vesna, Vodyanitsa, Reruns & Pull Guide
Genshin Impact Codes: Latest Primogem Rewards
Genshin Impact Tier List: Best Characters to Build